

Home Made Jam
Canned Home-Made Jam
I love home made jam, seriously, who doesn’t? You’d have to be insane! So, I’m lucky enough to have a sister-in-law who has much experience in jamming matters, and was kind enough to take me under her wing and show me the secrets of making and canning your very own home made jam. Much thanks to Valaura, without you, I may have had to buy sub-par jam from the store for the rest of my life.


There are SO many benefits to cooking and canning your own jam. Fist off, no preservatives or weird yucky stuff. Wait, first should have been that it tastes AMAZING! No, first should be that it provides a lot of bang for your buck. Or that it’s great for long term storage (I’ve cracked open a jar of home made jam that was 3 years old and it was still fabulous). Really, you just can’t go wrong. Plus, it’s fun, and kind of fancy.

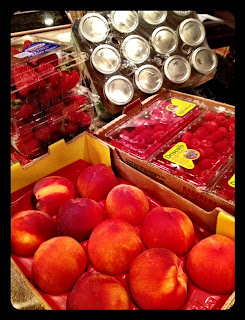
Doing jam is a very straight forward process. All you need is some fruit, pectin, a lot of sugar and jars. There’s no big secret or special way of stirring the mixture, or anything hard. As a matter of fact, the recipe that I use is the very same one that comes with your box of pectin. On that big old sheet they fold up and stuff in there is the break down of how much fruit you need for each batch, and they have it broken down for about 12 kinds of fruit. I’ll just recount the recipes I made this year, which were strawberry, raspberry, mixed berry and peach.

WHAT YOU NEED TO MAKE STRAWBERRY OR RASPBERRY JAM:
-4 pint sized mason jars and lids *when canning always use new lids to prevent bacteria from getting in your jars. You’ll also want an extra jar or container to put the left over jam in that won’t fill up a whole jar. That’s the jam you’re going to eat with a spoon while it’s still hot.
-canning utensils really help. I bought a box of canning basics from K-Mart for $10.00. It included a canning funnel, jar gripper, head space ruler, and magnetic lid picker-upper (yes, that is the technical name)
-4 pt. strawberries or raspberries that puree down to:
-5 cups crushed strawberries or raspberries
-1 box of pectin
-5 cups crushed strawberries or raspberries
-1 box of pectin
-7 cups of sugar
-1/2 teaspoon of butter
-timer
WHAT YOU NEED TO MAKE MIXED BERRY JAM (my fav):
-4 pint sized mason jars and lids *when canning always use new lids to prevent bacteria from getting in your jars. You’ll also want an extra jar or container to put the left over jam in that won’t fill up a whole jar. That’s the jam you’re going to eat with a spoon while it’s still hot.
-canning utensils really help. I bought a box of canning basics from K-Mart for $10.00. It included a canning funnel, jar gripper, head space ruler, and magnetic lid picker-upper (yes, that is the technical name)
-3 pt. strawberries that puree down to:
-2 1/2 cups crushed strawberries
-1 1/2 pt. raspberries that puree down to:
-1 1/2 cups crushed raspberries
-1 pt. blackberries that puree down to:
-1 cup crushed blackberries
-1 box of pectin
-2 1/2 cups crushed strawberries
-1 1/2 pt. raspberries that puree down to:
-1 1/2 cups crushed raspberries
-1 pt. blackberries that puree down to:
-1 cup crushed blackberries
-1 box of pectin
-7 cups of sugar
-1/2 teaspoon of butter
-timer
WHAT YOU NEED TO MAKE PEACH JAM:
-3 pint sized mason jars and lids *when canning always use new lids to prevent bacteria from getting in your jars. You’ll also want an extra jar or container to put the left over jam in that won’t fill up a whole jar. That’s the jam you’re going to eat with a spoon while it’s still hot.
-canning utensils really help. I bought a box of canning basics from K-Mart for $10.00. It included a canning funnel, jar gripper, head space ruler, and magnetic lid picker-upper (yes, that is the technical name)
-3 lb peaches that puree down to:
-4 cups crushed peaches
-1 box of pectin
-4 cups crushed peaches
-1 box of pectin
-5 1/2 cups of sugar
-1/2 teaspoon butter
-2 tablespoons lemon juice
-timer
THE METHOD:
Here’s the deal with making cooked and canned jam. You have to get everything ready to use FIRST and then start the process. Prepare all of your fruit, pre-measure it and put it in something to store it so it’s ready when you need it. Pre-measure you sugar every time before you turn on the burner. Have everything in it’s place and ready to roll, because this is a very time sensitive project, and over cooking could be disastrous.


FRUIT PREP:
The instructions in the box say to not puree your fruit, just to chop it very finely. So, either take hours and do it by hand or pulse it in a food processor. Yeah, I never do that. I turn the processor on and let it run until it’s liquid. It’s just the way I roll.


Prepping the berries is simple. Wash them, cut the stems off if need be and puree. Measure the puree out for the correct amount per recipe and then I pour it into gallon sized bags so when I’m ready to cook I just open and dump. I love to prep my fruit ahead of time and storing them in the gallon bags makes for easy freezing. You can store frozen puree for a few months, just make sure it’s completely defrosted when you’re ready to cook.


Prepping peaches takes a little more work, but it’s easy work. You need to scald them to get the skin off. Bring a stock pot of water to a rolling boil. Working in batches of about 4 peaches at a time, gently drop the peaches into the boiling water, set a timer for 1 minute, pull them out when the timer goes off and put them in a bowl. Immediately use a small knife and give the skin a scrape. It should lift up. Grab it and just pull it off. Continue peeling the peach until no skin is left and then quarter it and pull the pit out. Do this with all of the peaches. It works best when the peaches are warm, hence the small batches and working fast. Once they are all peeled and quartered, puree that junk up and measure it out.


JAR PREP:
Fruit, check. Moving onto the jars. Have you noticed yet that you don’t need a canner or hot bath to can jam? It’s true, but temperature is important. Your jars need to be clean, sterilized and warm when you put your hot jam in them. The lids and rings also need to be hot. Yes, I have been known to burn a thumb or two, but that’s why I like the magnetic lid grabber. The way I do this is put your jars in the dishwasher and run a cycle. If you have a heat dry or sanitize option, use it. If you jars are already clean and you don’t want to run a whole cycle, just put it on a quick rinse or heat cycle to get them warm and keep them in there until you need them. If they cool off, do a short cycle again. The purpose of keeping the jars warm is so the hot jam doesn’t crack them when you put it in. Even if the jars are room temp, they can crack while filling them.
Keep a sauce pan on the stove while you work that is filled with water and keep your lids and rings in it. Once you get it to a boil turn it to low and let it stay hot the whole time you cook. The lids have to be hot in order to soften the plastic on them that will eventually cool and seal the jar shut. That’s why you never re-use lids. Once that plastic has melted once, it won’t guarantee a secure seal again. I don’t think the rings need to be hot, but I keep them in there anyway, just to be on the safe side.


TIME TO JAM AND CAN:
Get everything in it’s place. Jars are warm and in the dishwasher, lids are hot on the stove, canning funnel, magnetic grabber, and head space ruler are all set where you are going to ladle the jam into the jars and sugar is measured and set by the stove.


Start with a large pot, the wider the bottom the better. With the burner off put in your puree, the butter (this keeps the mixture from bubbling or foaming which doesn’t effect the taste but takes away from presentation), the pectin, and lemon juice if you’re making peach. Turn your burner onto med/high and start stirring using a whip. DO NOT STOP STIRRING AND DO NOT WALK AWAY WHILE YOU ARE COOKING THE JAM! Yes, this takes an obnoxiously long time, but if you leave it, even for a minute or two, it will burn. Bring the mixture to a rolling boil. That means that it continues to boil even while you are stirring it.

Add the sugar all at once and boost your heat to high. Keep stirring until it returns to the rolling boil. As soon as it is there, set the timer for 1 minute. Stir continuously until timer goes off.

Remove it from the heat, grab your jars and start ladling it in.

You want to fill the jars to within 1/8 inch from the top. I fill them with a big ladle first and then go back with a cereal spoon to adjust the head space perfectly. Head space is important, it effects if the jar seals completely, so don’t estimate. If you have a little extra jam that won’t fill a jar, put it in a little container to eat right then, don’t waste it!

When they are all full, use a wet cloth and wipe the rim of each jar. Again, any jam on the rim could keep it from sealing or create bacterial in the jam. That would be a major bummer. Once the tops are clean, place a hot lid on each and screw on a rim. screw it on until finger tight.


And there you have it. Delicious, beautiful, fantastic, amazing jam.


<3, Sharla

0 comments:
Post a Comment