Friday, January 11, 2013


Valentine’s Day
Pendant Banner

Last year every time I turned around there were pendant banners hanging from everywhere.  I was ravenous with desire to have one.  So, I closed my eyes and took a leap and made it up as I went along...I think it turned out pretty ok...

I admit it, I love it!  This was such a fun, quick, easy project and I bought enough materials to make 6, so a lot of my friends ended up with one.  Just spreading the love on “love day”.

Materials:
~1 piece card stock
~1/4 yard of 3 corresponding fabrics for fronts
~3/4 yard fabric for backing
~1/4 yard solid fabric for ties
~3/4 yard batting
~Pinking sheers
~Thread
~Adhesive alphabet stencil OR freezer paper and die cut machine (like a Cricut)
~Fabric paint
~Sponge brush
~Jewels (optional)

Away we go...
First make your triangle patter piece.  Don’t try to make it perfect, if it’s a little lopsided it makes it more charming.  If you have a die cut machine you can use that, otherwise make your own.  My measurements were ....

Now that you have a pattern we are ready to cut.  Now, let me make note, I bought 3 fat quarters for the front fabric and was able to cut 6 triangles from each fat quarter.  So, a little bit of fabric goes a long way on this project.  The quickest way to cut is to make the sandwich of fabric, pin it, cut it and then it’s ready to sew.  

Start by putting your back fabric down right side down. 

Now lay your batting on top

and then finish with the front fabric on top right side up. 


Lay your triangle on top and pin.  

Cut around it using pinking sheers.
While keeping the pieces together unpin the triangle and put the pin back in to keep it all together.  Cut two triangles from each front fabric so you end up with 6 total triangles.

Now let’s put them together.  Zig zag stitch all the way around each triangle on a 1” seam allowance.  

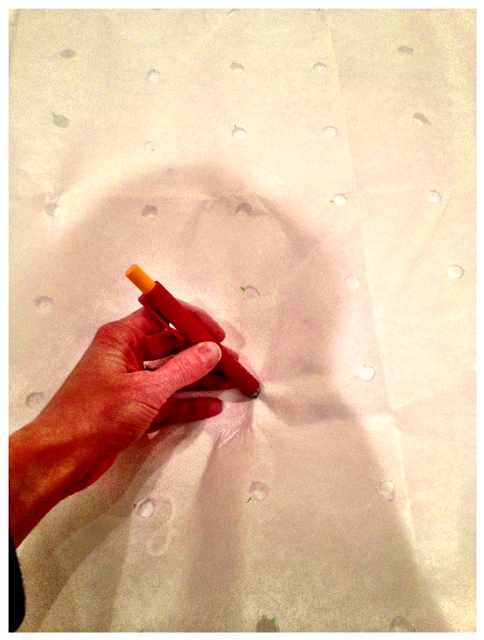
It’s time to stencil the letters on.  It is important that you use a stencil that adheres to your fabric, otherwise your paint will bleed and it won’t look as nice.  I’ve made this banner twice and the first time I bought an alphabet stencil that was self adhesive, like a sticker.  That’s the easy way.  

The cheaper way (which is how I made my second round) was to cut my stencil out of freezer paper using my Cricut machine.  

Freezer paper is fun because you can iron it onto fabric and it sticks tight but pulls off clean when you’re done.  

Which ever way you do it put your stencil on your triangles (make sure you like the order of the fabric before you paint) and grab your fabric paint.  

I do recommend using actual fabric paint, it’s less head ache and looks nice.  My little bottle was less than $2 at Jo Ann.  Paint your letters on and let it dry.

While you’re waiting for the paint to dry make the strips that will tie the banner together.  
Cut 10 strips 1”x 6”(short)
Cut 2 strips 1”x 10”(medium)
Cut 2 strips 1”x 24”(long)

Pull your stencils off your dried triangles.

Grab your 10 strips of 1”x 6” strips (from here out I will call these the short strips), we will sew all of these first.

The best way to visualize this is to lay out each letter of your banner in the order it will hang.  The short strips will be sewn to the left side of the “B”, the right side of the “B”, the left side of the “e”, the right side of the “M”,  the left side of the “i”, the right side of the “i”, the left side of the “n”, the right side of the “n”, the left side of the “e” and the right side of the “e”.  Sew them onto the back of the triangle using a zig zag stitch following the line you have already created when you sewed the triangles together.

Next sew the medium strips to the right side of the first “e” and the left side of the “M”.  This longer strip will give a bigger space to make the two words distinct.

Now use fabric glue or super glue to accent your letters with your jewels.  So cute!!!

Here’s the last step, tying the whole thing together.  Simply knot each word together, adjusting spacing between each letter.  Make sure to use the extra space between "Be" and "Mine".


  Trimmed each strip at an angle to give a bow feel.

Take your two long strips and make a big loop on one end and knot it, this is for hanging.  Then tie the long strips to the left side of the “B” and the right side of the “e”,


 and viola.....

Happy
Valentine’s Day

***Don't have the time to make your own banner?  Click here to visit us at our Etsy store and buy one already made!
<3, Sharla

Tuesday, January 1, 2013


Scrappy Quilt Tutorial

I truly believe that all things that are creative come from a collaborative effort.  Whether you saw something that inspired you to create something original, took an idea and made it your own, or actually had help from creative friends, everyone who creates can thank those around them for inspiring....

That is how these quilts came to be.
  
I have a friend who came to me with the idea of making a group quilt.  She asked 9 friends of hers to participate.  Each person was to sew 20 12x12 inch squares (two fabrics per square in a diagonal) and the theme was “I spy” in summer colors for kids.  
These were my fabrics, so cute, right?!

TO MAKE YOUR SQUARES:
Buy 1 1/4 yards for two fabrics.  Cut each fabric into 6"x6" squares.  You need 40 from each fabric.
Start by sewing two squares together side by side.  Press the seam open (now, I hate to iron, but it is a "must" when making a blanket).  And then do it again.
Now take your two strips of two squares and sew them together, making sure the patterns are alternating.  Press all of your seams open...
and BOOM, you have a 12"x12" (roughly) quilting square.  Don't worry if your square is not the exact right dimensions.  It will all work out when you put it together.

After we made our 20 identical squares we kept two of our own, and then swapped the rest for the two the other 9 people made.  It was a fun idea, and I was intrigued by the unknown.  So, I roped in Cassie (good friend to All Things Fab and great seamstress) and we went for it.  

The day we divided up our squares was, well, disappointing.  Even though we had the same theme, the squares were just too different to put together into a quilt that looked purposeful and nice.  That is until Cassie had the brilliant idea of instead of keeping the quilt in traditional block formation, cutting the squares into strips, adding our own scrap pieces from our left over fabric stash and making a quilt with long 12” wide strips using the squares and scrap fabric we had that looked good together. Check hers out...
 K, I know it's not finished, but you get the idea.  TO-DIE-FOR!

 On top of that, she had white sheets that she never uses (so they were in new condition) and cut them up for her white fabric instead of going and buying it new.  Did I mention Cassie is quite thrifty?  It’s one of the many things I like about her.  She did buy a little extra fabric to finish her edges, but that was also a bargain buy.  Her’s turned out AMAZING, ADORABLE, GENIUS, and INEXPENSIVE!  I was in like Flynn.

Let’s get started:

THE FABRIC
You need fabric (duh), how much?  It depends on what size of quilt you want to end up with.  Cassie made a full and I did a queen.  Start Quilting 2 is a great website to help you calculate how big a quilt you need for each size.  Stick with 12” wide strips, unless you’re making a king or cal-king.  For those sizes I’d jump to 24” wide.  For a crib quilt I’d make the strips 6” wide.

As far as choosing your fabric, go with about 3 or 4 colors that look good together and then you can choose fabric that varies in shade.  Cassie stuck with her main colors as green and pink to match her daughter’s room.  She accomplished this by using bigger blocks of fabric with those colors and filling in the rest.  She even used the same fabric in the quilt that she had in other parts of the room.  Super matchy and fabulous.  My main colors were green, pink, blue, and purple.  My quilt was a little more busy but I tried to tie it together by making the purple frames around the strips.  I think it worked, how ‘bout you?

CUTTING
You actually have some room to play when you start cutting. If you like the look of the blocks cut up, choose some fabric that coordinates and sew them together into a square and then cut them into 3 pieces (like I did with the monkeys and rainbow chevron).


Any time you make a quilt, ALWAYS IRON YOUR SEAMS DOWN!  It gives you better measurements while you’re working and looks nicer.  When I started cutting the fabric I did not measure at all.  This part is not perfect, that’s the beauty of it.  If you cut some on an angle, even more charming!  But don't cut on too steep of an angle, it's a headache later.  If you don’t want to put the extra work into cutting up the 12x12” squares, just do pieces that are one material, that’s great, you just want them to be the same width.  For twin, full and queen sizes make 4 strips.  For crib quilts, 3 strips and for king and cal-king do 5 strips.  The length depends on your size.  I made mine as long as I could until the fabric I was using ran out.  I knew I could always add length and width to the quilt with my white fabric if need be.    

SEWING THE STRIPS
Once you have the patterned fabric cut start sewing together your strips until they are the length you want.  I laid my strips out to make sure I divided the fabric out well and that they looked good.  

This part is pretty straight forward, sew each strip together and press the seam until you have a complete row.

Once your strips are done you can move onto the white fabric or you can frame them like I did.  

To frame them, cut strips of a solid color into 2” wide strips.  I pinned my purple strips to the pattern strips and measured the space in between to make sure it was even all the way down.  Because I cut some of my fabric on a diagonal I had to do some adjusting at this point to make sure the strips were straight.  

After the long solid color strips were on I needed to trim the top and bottom to be straight and then added the solid colored strips on top and bottom to complete the frame.  

SEWING THE WHITE
Now, it’s time to measure.  Lay out your strips and measure how much blanket you’ve created.  You need to calculate how much white you will need to make the blanket wide enough and long enough to cover your bed.  Cassie and I both did white strips in between the patterned and then framed the whole blanket in white and then added a colored boarder.  The extra white you see on the most outer edge of my blanket is the fabric from the back of the quilt, which is a result of the way I finish my quilts.  It is my opinion that it’s better for a quilt to be too big than too small.  Always go over your measurements if in doubt.

Once you know how much more blanket you need divide the width according to how many strips of white you want.  In my case, I divided the width I still needed by 5, I needed a white strip in between each patterned strip plus a white strip on the outside of the edge strips.  Then I cut them.  

Next, I sewed each long strip together side by side.  The patter for me went; white, pattern, white, pattern, white, patter, white, pattern, white.

Now to finish off the length.  I measured how much more blanket I needed to make it long enough for the bed and divided that number by 2, one strip at the top and one at the bottom.  I cut them and sewed them accordingly.

THE COLORED BOARDER
HOLY COW!  You’re almost there.  The last thing was for the colored boarder.  Mine was 2” wide, so I just cut my solid colored fabric into 2” strips and measured it against the blanket, sewing each strip end to end to get the right length per side.  I sewed them on one side at a time, and voila!  The front is complete!

THE BACK FABRIC
It’s math time again.  You need enough fabric to finish the back of the blanket.  I love to finish my quilts with flannel.  It’s so cozy, warm, soft, and you can usually find it on a deal.  I buy enough back fabric to be the same size as the quilt, plus 6” on each side.  When I got home, I cut the flannel...  WRONG!  I washed it in hot water and dried it on hot.  Flannel shrinks and must be pre-shrunk.  After I washed it I cut it according to the length of my blanket and sewed the pieces together to make it wide enough.  You are now ready to quilt it!

TYING THE QUILT
Decide which side you want the strings to show up on.  I like mine on the back so they don’t take away from the patterned fabric.  Which ever side you DON’T want the stings on put down first, right side down.  Next lay out your batting.  Then lay the fabric you want the strings to show up on right side up.  Now, pin the crap out of that jazz.  

If you don’t have a Cambridge system, invest.  

It’s a fast, easy way to mark where to tie your knots when you are tying a quilt.  I use mine every time.  Here's what it looks like...

My daughter, Olivia, was nice enough to hide behind it while I look a pic.  Basically it's a high quality piece of material with holes in it that you mark in.  Mine is a crib size with 3 inch spacing between the holes.  I use it on everything because you just pick it up and move it when you need to mark more area.

Once you’ve pinned and marked, you ready to tie it.  I love tying quilts, I don’t know why, but it’s my favorite part.  Start the knot by going down through the fabric.  Come back up about 2-3 mm away from where you went down.  Now, tie the string the same way to start out tying your shoe laces.  


This is not tricky!  Just tie your string like a shoe lace and then do it again but if you went up the first time, the second time go down.  Still confused?  Don't stress, just tie a tight knot and you'll be fine.


Don’t cut your string, just move onto the next dot and repeat the process until you’ve done them all.  Once every dot has been tied, cut the string in the center and the quilt is tied!


FINISHING THE EDGES
I hate, hate, hate trying to sew binding onto a quilt, but I love the look of a frame around the front.  Remember when I told you to leave 6” of back fabric all the way around?  Now I want you to trim the batting to match the edges of the front of the quilt.  

Then trim the back fabric to 1” wider than the front.  

All you’re going to do is fold the back fabric over 1/2”...

and then again 1/2” 

so all of the raw edge of all 3 layers is tucked inside that little roll and you are going to zig zag stitch the edge all the way down.  You want the zig zag to catch the roll on the “zig” and the front of the blanket on the “zag”.  


Start at the top and go all the way to the bottom and back stitch.  Now for the next side, same thing, including rolling over the corners so they end up looking like this...

After all four sides, you guessed it, the whole things is ready to use.


<3, Sharla